
Tuesday, December 23, 2008
Pictures: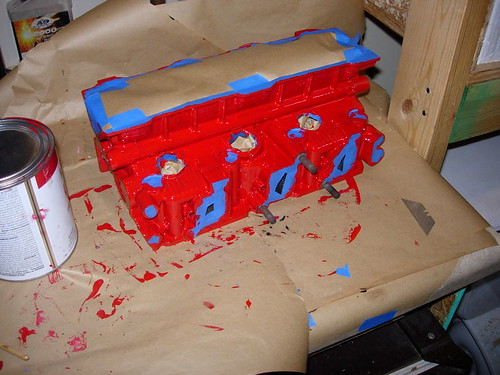 Painted the engine block. Forgot to get a picture of it clean. This matches my red, silver, and black theme. 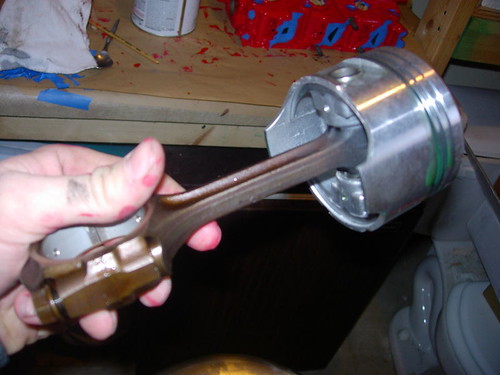 I got the head and the pistons back from the shop. Don't know what that green stuff is...  The interior. Despite the general appearance, there is not much terribly wrong with it. Missing buttons, seat covers, floor mats: Done! 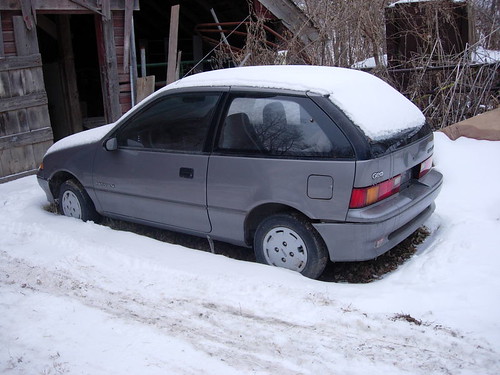 Here she is! There is very minimal rust, and besides paint color fading it looks great! 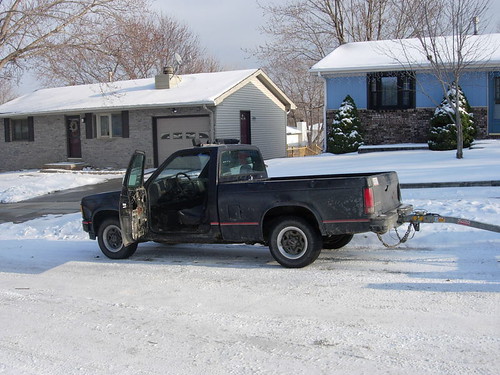 This is what I pulled the Geo with, with a car dolly from U-Haul. I also found out that the water pump broke. | This morning I got the engine head back, with freshly installed intake and exhaust valves, and the pistons installed on the arms. Total bill was $184, it would probably be about $100 if you only needed the valves done and the head resurfaced, but I wanted a couple other things done. Here is what the machine shop did: Resurface head, install 3 intake and 3 exhaust valves (they also bought the valve stem seals but I bought the valves), hone and cross-hatch cylinder walls, remove old pistons from arms and install new ones. I think that's it. What do you think? Was $184 a reasonable amount? I think they did good work, and had great customer service. Anyway, after I got the head and pistons back, I cleaned up the head, taped it, and painted it red. You can see a picture of it painted, but I forgot to get one of it bare. As I probably stated before, all three exhaust valves were burnt out, and one was missing a small chunk. I forgot to ask for them back to get a picture, but the one was pretty bad. Probably why it wouldn't run except at high rpm's. Painting the head didn't take very long, probably about 5 minutes, but cleaning it with paint prep cleaner and taping it took over half an hour. Keep that in mind if you decide to do anything like this: Prep time takes the most time. Later that afternoon, I went to move the Geo from it's holding spot out at my parents farm to the friend with the garage who is so graciously lending me some space. I rented a car dolly from U-Haul for less than $50, and headed out. It's an hour from my house to the parents, and an extra 30 minutes to the friends. On the way to the parents, the truck didn't have much power but I thought it had enough to move the car. Turned out I was right! I moved the car into the garage, and Wednesday I will head back over with lots of parts to get started: Clean engine compartment, paint engine compartment, clear out interior, clean ventilation system, mouse-proof ventilation system, seat covers, floor mats, extra bits, install engine, double check everything, break in rebuilt engine, done! (I think) Done with news about the car, but here's a side story of the nights events: After I moved the car and was headed home for the night, the battery light started flickering. I thought it was maybe a loose nut, so I pulled into a gas station and billowing clouds of smoke pured out from under the hood! Oh no, I forgot my flashlight! Thankfully, it was "only" steam, but (after purchasing a $3 flashlight) I couldn't find where the water was leaking, and I thought it might be a blown gasket. After a while, I got up the gumption to pour more antifreeze in and, on removing the cap, heard a loud gushing noise: The water pump was leaking gobs of fluid out near the fan spindle! So I guess I have to get a new water pump... I decided to try and make it at least to the U-Haul to return the car dolly, and headed out from the gas station. Well, I got pretty close, but the spindle on the water pump was the part broken, which means the serpentine belt didn't have much tension, which means the battery didn't charge, which means when the engine died at a red light it wouldn't restart. Thankfully, the truck died right at a gas station, and as soon as I got out to think a tow truck pulled into the station to get gas! I meandered over and got him to tow the truck, return the trailer, and drop me and truck off at my house. The cost: $65. That might have been high for a tow, but he kind of fudged on the towing/DOT rules by towing me with a trailer in tow, so I didn't mind a whole lot. Cost of everything today: Machine shop bill $180 U-Haul rental $48 Gasoline $23 Tow truck $65 Summary $316 Cost of the experience? Not really priceless, but it was an adventure. |
Monday, December 22, 2008
Pictures: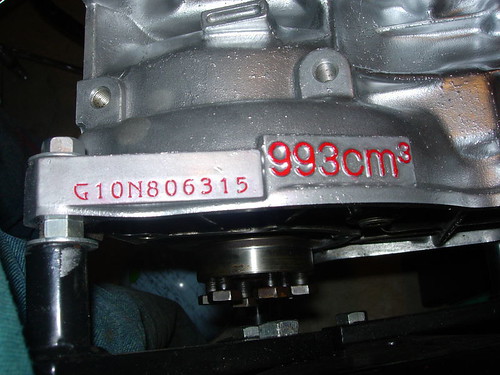 Here is the detail work on the engine. Yes, it's that small.  Painted the crankshaft and water pump pulley. The big one looks rough because the metal has texture. 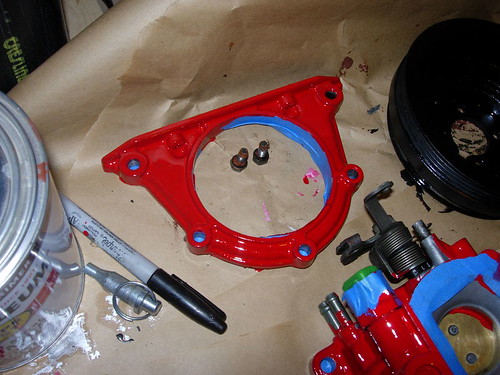 The rear main seal. No one will probably be able to see it, I don't know why I painted it. 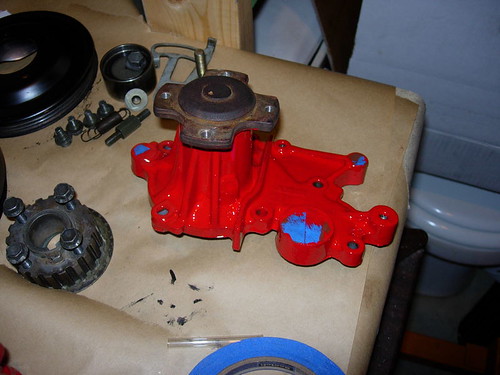 The water pump. Things are coming together now. 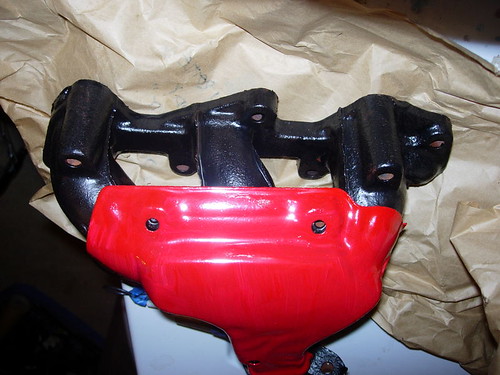 The exhaust manifold and cover placed on top to visualize. This is the angle you will see it from once installed. | I did some more paint work on the engine today, the water pump, the throttle body and injector assembly, the rear seal, the exhaust manifold and cover, the pulleys, some others, and the detail work on the engine block. I especially liked the detail work on the engine block, it really looks nice I think. The engine serial number was indented, so I basically filled the letters with a small brush and wiped off the excess with my finger. It turned out real nice, as you can see from the picture. The pulleys each had some rust, so I ground it off with the Dremel tool wire brush, and painted them satin black. I didn't paint the part that the belt touches, didn't think it was a good idea. I might put a red line on the pulleys for show, and I will paint in the timing mark notch on the crankshaft pulley. The rear main seal I painted, although it will have a flywheel and transmission bell housing, so I don't know why I did... I painted the exhaust manifold black, and the cover red. I think it will look real sharp, so long as I follow a theme. A minimalist theme, to be sure. I took the pistons to the machinist, since I couldn't get the piston pins out myself. Back when I dropped everything off (head, block, valves) I realized I forgot valve stem seals, no parts store could have them before Christmas, but he will have them Tuesday! He said he should have it done Tuesday morning, and then I will be rocking away. Praise the Lord: A family from church is letting me use their garage to install the engine and do some extra work. I should be moving the car in their Tuesday, and installing the engine Wednesday (hopefully). I will do the mechanical work to install the engine and clean it up, and I want to paint under the hood. I have to do some interior work, it is an old farm car and smells of mice. I will probably not do much with the interior besides removing most everything and washing it out. I went to move the car today and a sudden blizzard stopped me. Turned out to not last long, but by then it was too late to go. |
Saturday, December 20, 2008
Pictures: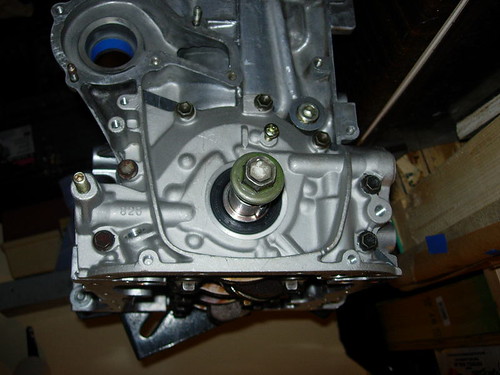 Here is the front main seal and oil pump installed. 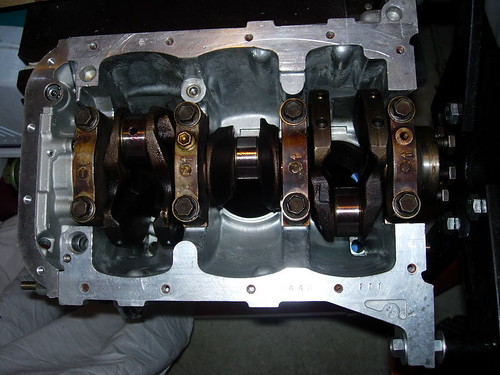 The crankshaft installed with new bearings and thrust washers. This was pretty easy. 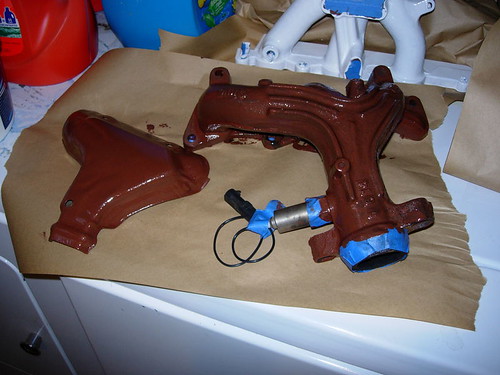 Exhaust manifold and cover with the Rusty Stuff Primer, they were pretty bad, like normal exhaust I suppose. 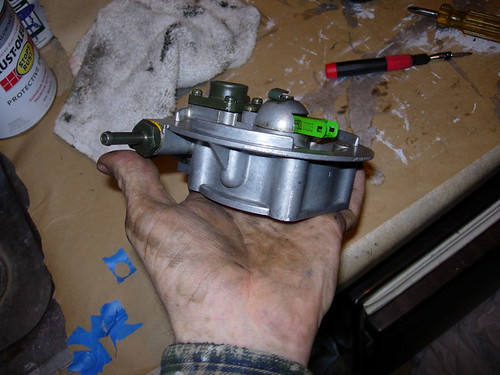 I cleaned the throttle body, and will probably paint it soon. It was very messy, and I hope I don't have to replace the injector. 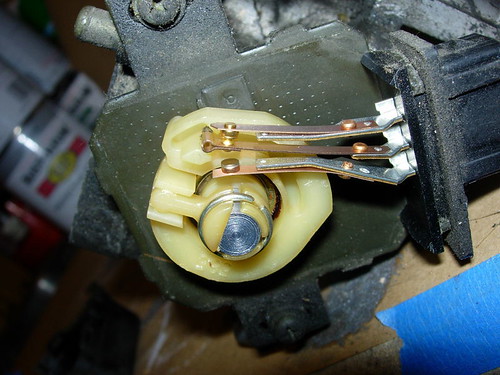 This is the primitive throttle position sensor. It can detect three positions. | I painted the exhaust manifold with some Rusty Stuff Primer today, and started installing things: Crankshaft, oil pump and front oil seal. Then I cleaned the throttle body real well. Make sure you torque everything down to specs. I went ahead and replaced the crankshaft bearings and the thrust washers. They were all worn out enough to replace, but thankfully I didn't need to go to the oversized. It was pretty easy to install the crankshaft. When I went to install the oil pump, it came with a kit and had the seal preinstalled. Since I didn't have the official patented "Seal Installer" piece of poly tube, here is what I did: Placed the thing in a bit crooked, so one piece of the seal lip is just barely hanging on. Then, using the handle end of a spoon (something not pointy, and without sharp edges) I went around the edge of the lip, while gently pushing down on the assembly. This works great, but you have to have patience and don't press too hard. When you install the seal, if you mess up to need to remove it (I forgot the gasket!), make sure the spring is back on the seal. Mine fell off onto the crankshaft, and I almost didn't notice it. The throttle body had so much oil on it, I wonder if the injectors need replacing. I hope not, since the screws holding the injector in are impossible to remove. If I have to replace the injector, I will upgrade to something newer. Notice the "throttle position sensor"? It is a primitive type which sense only three positions of the pedal: Foot off, foot on, and pedal to the metal. You can adjust where the last one picks up, but it is really rather primitive, and I wonder if I can change it out with something better... Okay, until next time, stay classy, World! |
Friday, December 19, 2008
Pictures: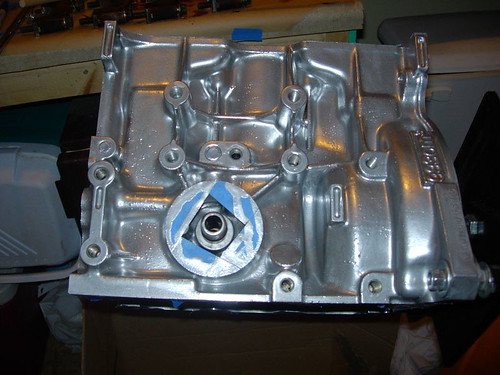 I painted the engine block "Aluminum". 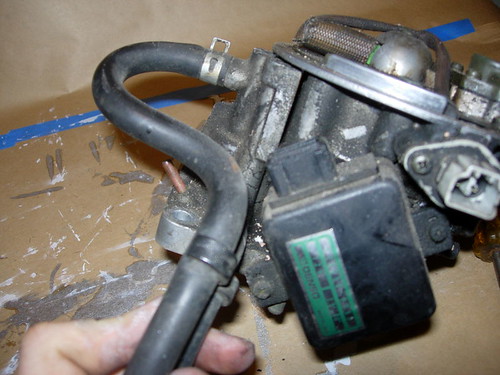 This is the primitive throttle position sensor, which is basically a three-way switch. 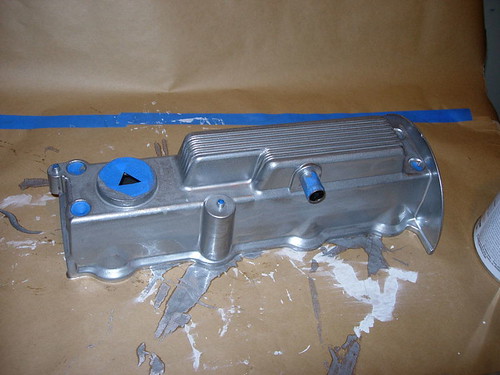 Here is the painted valve cover, also painted "Aluminum". 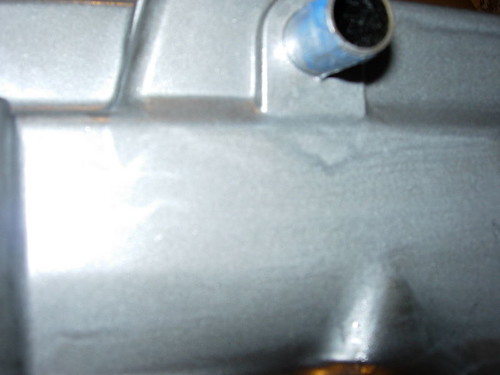 Here you can see the paint running: It was thin as water, and was very difficult to do. The second coat helped.  Here is the intake manifold, painted white. It looks spotty, but the second coat made it shine. 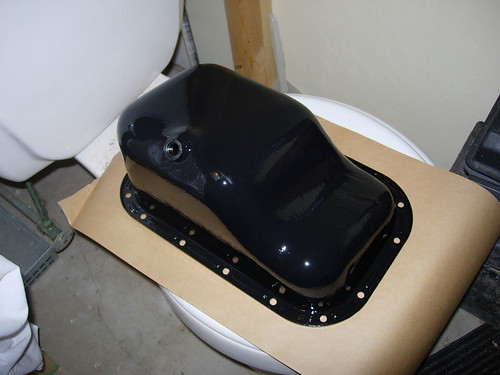 Here is the oil pan, it looks real great. Sitting there on the toilet in the spare bathroom (the garage was freezing!). | Well, today I started back on the Geo again, got done with finals at school! The torn-apart engine has been lying in the garage since about when school started, I guess, so that is where I started. I took the block to a machine shop because I didn't want to mess it up, and I don't really have the tools to do it right. The block has to be room temperature, so while it was warming up (it had been in the freezing garage), I went home and started cleaning and painting parts. When I took the head in, the machinist pointed out the burnt out valve that I noticed earlier, so that is at least one reason it didn't work. I got a few things painted, as you can see to the side: The oil pan, the valve cover, the intake manifold. The black and white Rustoleum paint were nice and thick, and easy to work with, but the silver was like water. It ran a lot, as you can see in the close-up of the valve cover. You can see some pictures of the throttle body and injector as I took it apart. The whole thing was much more messy, I imagine there had been a lot of oil blowing back, or just leaking everywhere: It was pretty messy. If you get a Geo, one sure thing that can help is to make sure the valve cover gasket is flexible. They are only about $10, so if you have doubts buy a new one. It will save you lots of mess, since that seems to be a major leak on every Geo I have owned/seen. |
Thursday, November 6, 2008
Greetings fellow web-friends!
I know this site hasn't been looked after for a while, but I wanted to let you know that I am definitely still working on this car. I started a different, more immediately important, project at the school I attend, and this coupled with the actual school has meant the poor Geo Engine has sat in the garage for just over a month now. This does not make my brother (who I rent from) very happy, but he is busy with rebuilding a house (here) so he doesn't use the garage much anyways...
So hopefully over winter break I will have time to finally get around to finishing up the engine, and then put it in the car. It will really help reduce my fuel cost, and I don't think gas prices will stay below the $2 mark for long after January 20th, if you catch my drift. Okay, I will give you some pictures next time, I will probably just start posting information about this Geo for a while.
Wednesday, October 1, 2008
| Pictures: Here it is, naked. Rabbit Tracks, standing by.  With all that blue tape.  The manifold, with brown primer: Rustoleum special!  | Not much news, except that I painted the intake manifold today. It is going to be a wonderful brown color. Ha ha! No way, man! That is just the primer, a Rustoleum special to be sure. Here you can see the intake before and after shots. I used a foam brush applicator, mostly because of laziness, and it doesn't look too bad until you get it in bright light: I will probably use an airbrush to paint it the actual color. Right now I am having a hard time deciding, but I think I will paint the intake manifold white and the throttle body red to match the head. In the picture you will notice a small bowl and spoon, containing the necessity of life: Ice Cream! Delicious "Rabbit Tracks", although I would prefer some homemade chocolate fudge stuff. |
Monday, September 29, 2008
 So I bought this Geo right? A friend found it on craigslist for me, and I paid $500 for it, sight unseen. Not a good idea, I know, but it "felt right." Also a bad idea.
Anyway, I went and bought it, hauled it to my folks house on a U-Haul car dolly trailer ($48) and spent a few tanks of gas for it ($26+$31+$27+$20=$104). Now it is sitting in their driveway, out of the way mostly. Lucky them.
So when I went and bought it, looking at it for the first time, I was amazed at how little rust there was on it. I mean, I didn't get  underneath until later, but it was real clean! The interior is trashed, but no rust yet. The engine turns over, sparks, low compression, gets fuel, just won't start. Lots of oil leaking around the head and block, so I figured I should look closer.
So now, I pulled the engine out and am rebuilding it (133K miles, it's about time to redo the head), and in the process I decided to paint it! Pictures to come, but here it is sitting on my Harbor Freight engine stand ($51), all cleaned up, casting imperfections have been ground down, wire wheel ground the oxidation and oil burns, and tomorrow or Wednesday I will paint it up!
I am using "Rustoleum" brand paint, on recommendation of several other internet peoples, and my color scheme is shown (roughly) in the pictures. I should have it painted this week, and the parts are already here ($273) for a full rebuild of the engine. I am contemplating getting the cam shaft re-milled to the XFi specs, which would give a significant mpg increase, but I can do that later as time allows. School is calling, and failing grades are not enjoyable no matter how high the mpg!
Saturday, September 20, 2008
This is a usually up to date cost sheet of the car.
$500 Cost of car
$104 Cost of gas to get car
$48 Dolly trailer to get the car
$273 Engine rebuild kit (full, specs to come later)
$50 All the different paint (for engine, body, interior, etc)
-----------
$975 Running Total Cost
-----------
This is nearly as much as I spent for my first Geo, for it's initial cost!
Subscribe to:
Posts (Atom)